Fine-Tuning: Personalizing Your Code Suggestions
Fine-tuning is a powerful technique to make code suggestions more relevant and accurate.
In our previous article we explained the concept of fine-tuning and how it works at Refact.
In this article, we will take a closer look at how to create fine-tuned models with Refact.
First, let’s have a quick intro to the concept of fine-tuning.
Fine-tuning in a nutshell
By training a model on a specific codebase, we get an AI coding assistant that is aware of the practices used in a particular codebase and can generate suggestions tailored for a specific project.
In Refact, fine-tuning plays a huge role because it enables the model to:
- Memorize class and function names and API usage patterns in your codebase
- Adapt to your coding style
- Help developers write correct and idiomatic code on the first try
Getting started with fine-tuning at Refact
To get a fine-tuned model, you need to complete a couple of steps
- upload the dataset
- train the model
- use your fine-tuned model and see the benefits!
Which data should I use?
The right data to use is your entire company’s codebase, with a notable exception: bad code. The model tries to match what it’s trained on, and if it’s trained on bad code, the results from the model will be, of course, bad.
Also, probably you don’t want to train on the libraries you use. The model will learn to write similar libraries again, not to help you write your project. But you can include examples for these libraries to capture the intended use of these libraries.
Uploading the dataset
In the previous section of this article, we reviewed the principles you need to follow to get the best quality possible of your model.
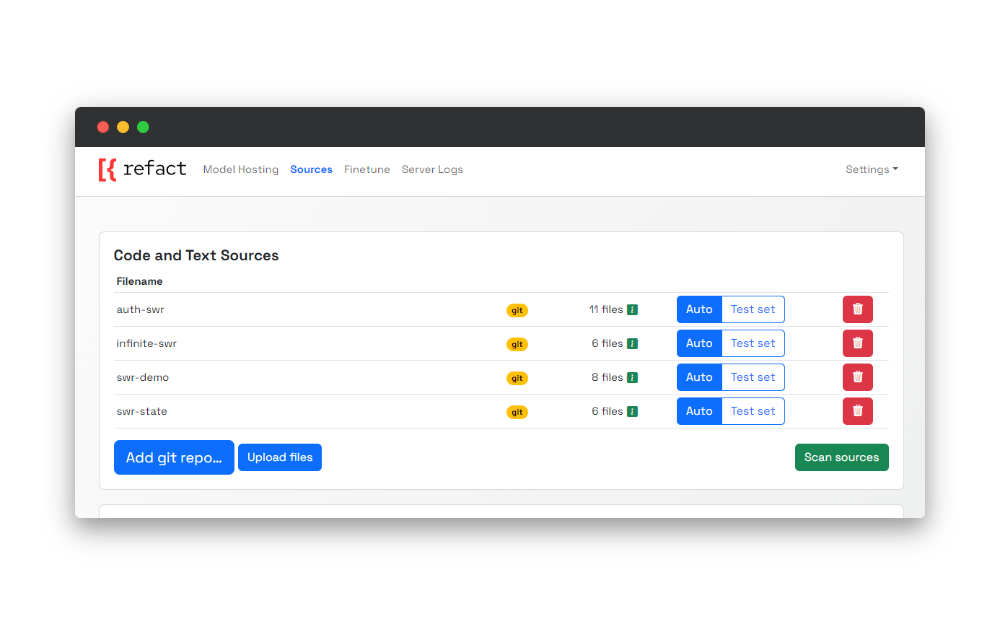
In Refact, that can be achieved by navigating to the sources page and picking one of three options available:
- adding a URL to the git repo
- uploading an archive to Refact
- adding a URL to the archive
Scanning the dataset
Once the upload process is completed, it’s time to scan sources. Refact analyses the sources you uploaded to break down the types of files available in the dataset.
The primary purpose of that process is to let you select specific files for the fine-tuning process.
Since projects usually contain many important files for them to function but might not be relevant for the fine-tuning process, you need to select the specific files that carry the code that will make your model context-aware. As a result of that, the quality of suggestions will be improved.
Once the scanning process is finished, you will see the file types available for selection. In addition to that, Refact gives you a summary of the scanning results - the amount for accepted and rejected files.
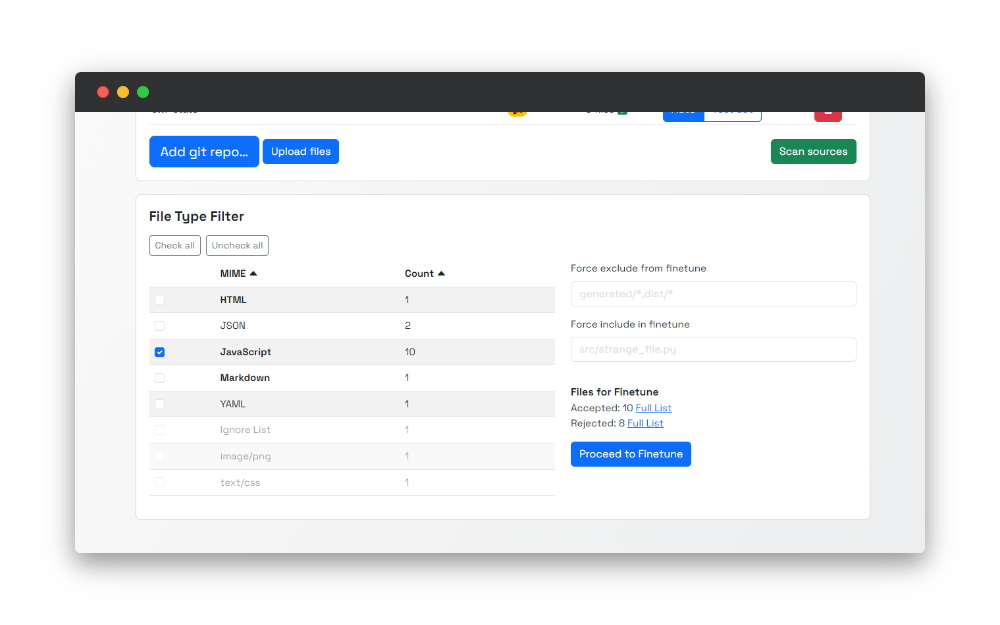
And the reasonable question is why some files were rejected, and what are these files?
You will be redirected to the page with the complete list of rejected files by clicking the’ Full list’ button. And here are some possible reasons why those are included in that list:
- Linguist error - we use Linguist to determine which programming language is used in your data set. If that error occurs, most likely, we were not able to open the file, or the file is broken
- Not text - with that case, we exclude binary files in the scanning process
- Too large - files that are more than 512kb in size are not included in the dataset for the fine-tuning
Refact scanning is an intelligent process that ensures you provide important and relevant data for the model training process. You can check the complete list of rejection reasons in the documentation.
Filtering and Training
Once the scanning process is completed, it’s time for the last step - filtering and fine-tuning.
When navigating to the finetune page, you will see the interface for the fine-tuning process. This is a complete fine-tuning dashboard where you can specify the fine-tuning settings, see the process in real time, and pick specific LoRAs to use in your plugin. LoRAs as an add-on for the model you are using to make those enhanced.
The first thing we need to do is run the filtering. The process is similar to the scanning and can be treated as a second iteration to ensure the best data quality is passed to a training stage.

Similarly, once the filtering is completed, you will see debrief statistics - the amount of accepted and rejected files.
Right after doing that, it’s time to initiate the training process! The training will start once you click the Run Finetune button. Training is a time-consuming process that you can monitor in real-time. There are several things you should look for monitoring:
Fine-tuning Analytics
At the right part of the page, the real-time updating graph is available with two parameters:
- test
- train
That data can help you to evaluate the quality of training in real time.
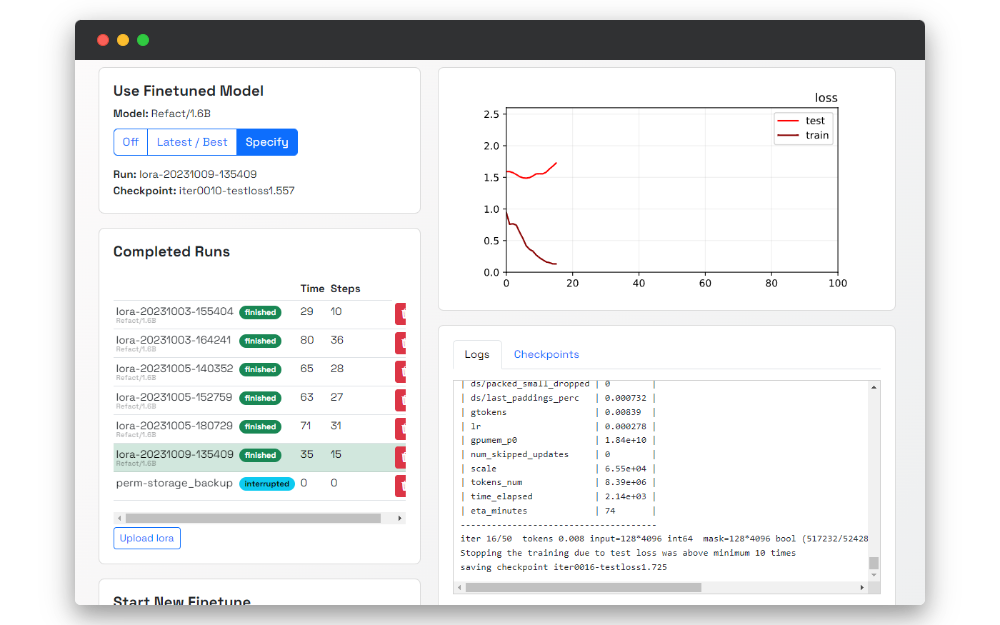
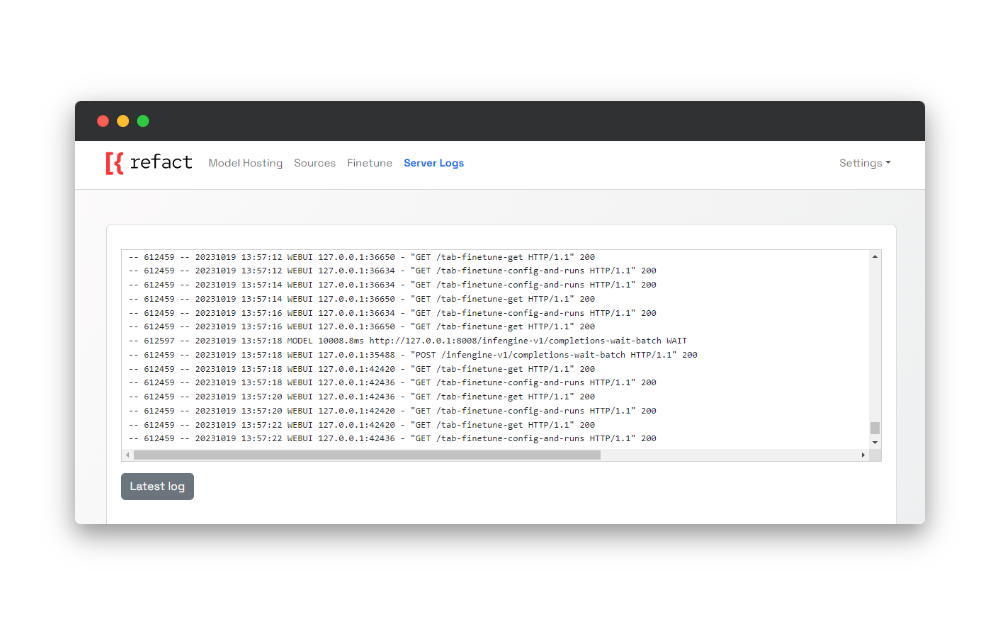
Logs
On the Logs page, you can find real-time logs about everything that happens on your self-hosted instance of Refact.
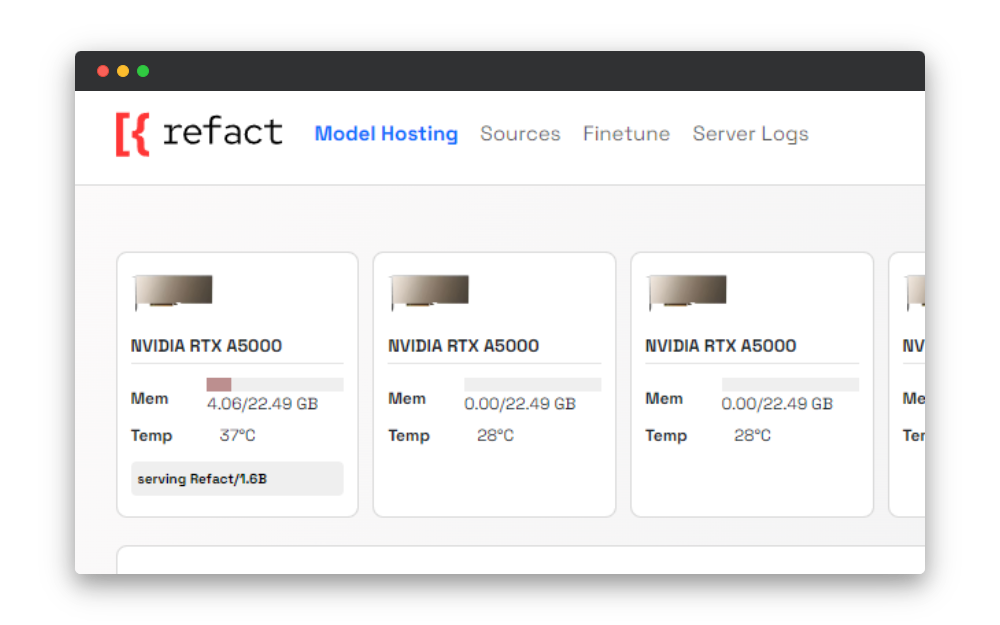
Video card info card
On the Model Hosting page, you can find a card with info about your video card and statuses that indicate the stage of the fine-tuning process.
Fine-tuning in action
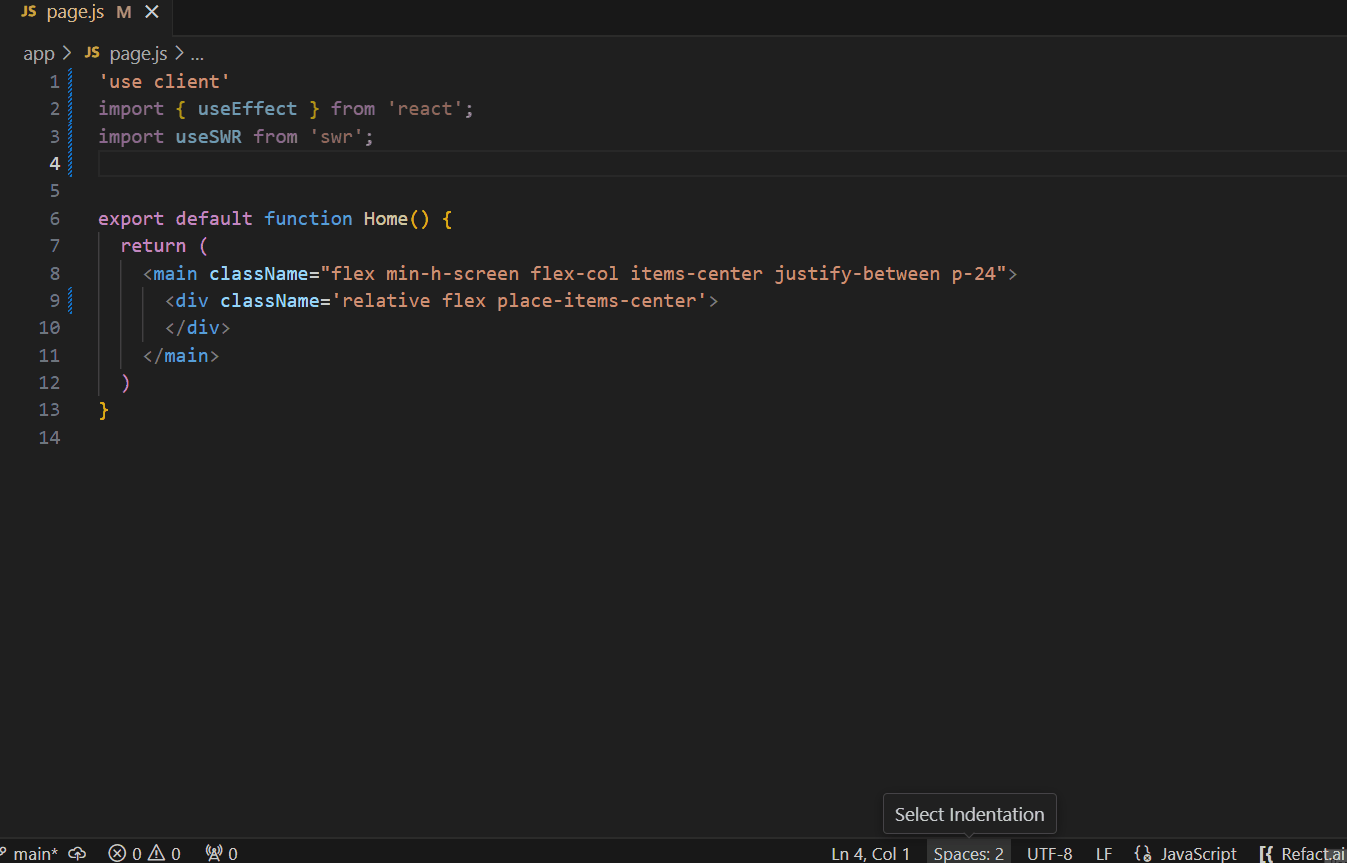
Imagine a team of developers working on a project.
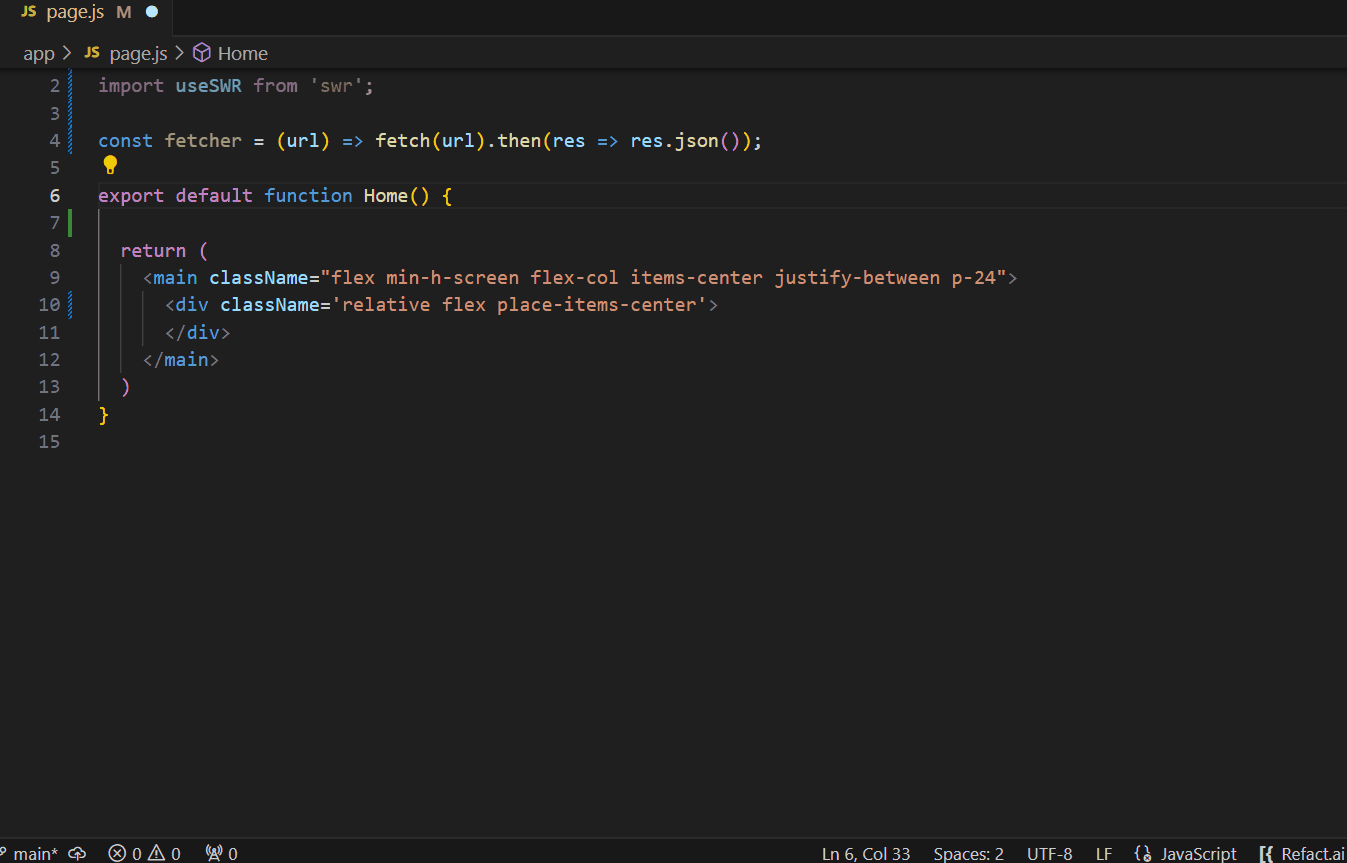
This is where the power of fine-tuning an AI coding assistant comes into play. The team decided to customize a pre-trained model to make it aware of how to use SWR, a set of pre-built React hooks for efficient data fetching.
The suggestions the team will get with a regular model will be accurate from the Javascript point of view, but the AI assistant won’t know how these React hooks should be used.
By fine-tuning the model to their particular needs, the team experiences significant advantages. From now on, the quality of suggestions will be significantly improved, and AI assistant generates suggestions that indicate that it’s aware of the context of their code.
Conclusion
In this article, we’ve discovered the power of fine-tuning AI models for coding assistants with Refact. Training models to specific needs improves productivity and developer experience.
Looking ahead, we’re committed to continuing to improve the developer experience. Join our Discord server to be part of the community and share your insights.
If you’ve found Refact valuable, show your support! Give us a star on GitHub and help us reach more developers.